My Go-To Tools for a Spotless Home: Bathrooms, Bedrooms, Floors
After years of tackling dust, grime, and hidden messes across countless homes, I’ve developed some strong opinions on cleaning tools. There are products out there that promise the world, but only a few truly deliver. I’m here to share what I’ve learned about keeping those tricky spots immaculate.
Why a Cordless Air Duster Changed My Cleaning Routine
Let me be blunt: if you’re still buying canned air, you’re throwing money away. I used to buy those cans by the dozen, only to have them run out mid-job or freeze up. The waste, the cost, the environmental impact—it all adds up. Switching to a rechargeable, cordless air duster was one of the best decisions I ever made for my cleaning arsenal. It’s not just for keyboards; it’s a powerhouse for vents, intricate decor, and anywhere dust loves to settle out of reach.
The Problem with Canned Air
Canned air, or more accurately, compressed gas, is a short-term solution at best. The propellant often leaves a residue, and the cans lose pressure quickly, especially when you need a consistent blast. Trying to clean a dusty fan or a intricate light fixture with a sputtering can of air is frustrating. Plus, they’re cold, literally. The chilling effect on electronics isn’t ideal, and the stream often isn’t powerful or precise enough to dislodge stubborn debris deep within crevices. They are single-use items that pile up in landfills, and the recurring cost is significant over time.
How Cordless Dusting Revolutionized My Tech Care
The moment I got my hands on a quality electric air duster, my approach to dusting everything from electronics to decorative items shifted entirely. The T800 Electric Air Duster, priced around $67.46 with a 4.3/5 rating from 389 reviews, became my primary tool. This thing is a beast. It provides a consistent, strong airflow that doesn’t falter. I can clear out PC towers, keyboard crevices, and even intricate bedroom decor like carved headboards or ornate lamps without a second thought. It’s cordless, so I can take it anywhere, from my home office to the garage, or even outside to blow leaves off my patio furniture. The adjustable speed settings are key; a gentle puff for delicate items, and full power to blast out years of accumulated dust from radiator fins. It’s rechargeable, so I never run out of “air” and I’m not creating more waste. It’s simply a smarter, more effective, and more sustainable way to manage dust.
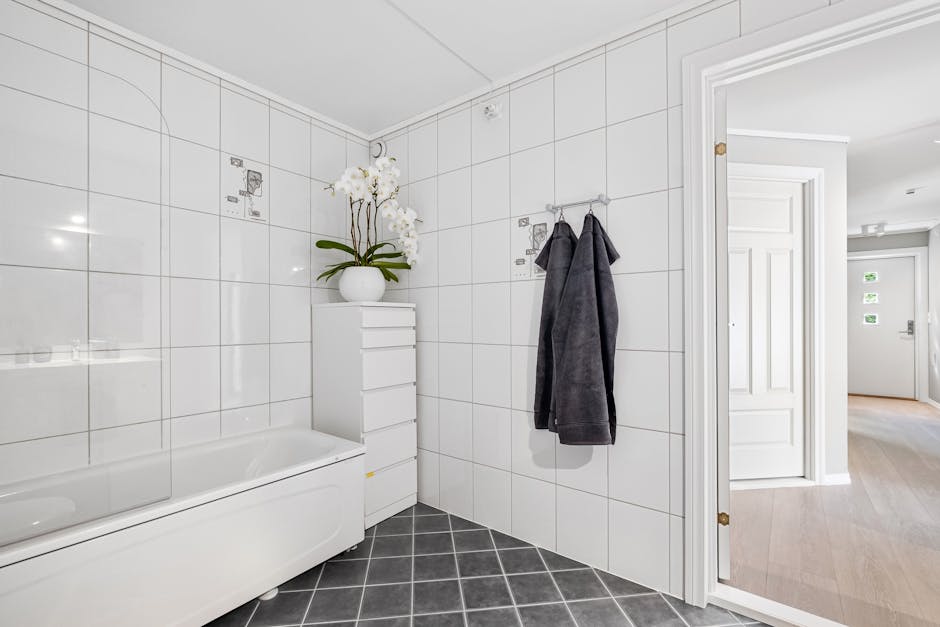
Deep Cleaning Bathroom Vents and Nooks: My Strategy
Bathrooms are notorious for hidden grime. Steam, humidity, and microscopic particles create an ideal environment for mold and dust buildup in places you barely notice until it’s a real problem. My strategy for keeping these areas pristine doesn’t involve harsh chemicals or endless scrubbing. It’s about prevention and targeted, consistent action.
Tackling Mold and Grime in Tight Spaces
Those ceiling exhaust vents are often overlooked. They pull moist air, but also dust, hairspray, and general bathroom debris. Over time, they become clogged and less efficient, leading to more moisture issues. I make it a point to pop off the vent cover every quarter. First, I use a vacuum with a brush attachment to get the loose, dry dust. Then, for the interior fan blades and housing, I hit it with my air duster. The T800 Electric Air Duster is perfect for this, blasting away caked-on dust from the motor and fan blades without needing to disassemble the whole unit. For any visible mold spots, a simple solution of white vinegar and water (50/50) in a spray bottle does wonders. Spray, let it sit for a few minutes, then wipe clean with a microfiber cloth. This approach minimizes the need for heavy-duty scrubbing and harsh fumes.
Essential Brushes and Solutions for Bathroom Hygiene
Beyond the vents, think about the tiny gaps around faucet bases, the seams of the toilet, and the grout lines in your shower. These are prime spots for grime. I rely heavily on small, stiff-bristled brushes—like an old toothbrush or specialized grout brushes. For faucet bases, a simple mix of baking soda and a little water to form a paste works wonders. Apply, let it sit, then scrub gently. The abrasive nature of the baking soda helps lift away mineral deposits and soap scum without scratching. For grout, a hydrogen peroxide solution (3%) works as a mild disinfectant and whitener. Spray directly, let it bubble, and then scrub. For general surfaces, I prefer pH-neutral cleaners or a diluted all-purpose cleaner that won’t strip finishes. I avoid abrasive sponges on acrylic or fiberglass tubs to prevent micro-scratches that can harbor more dirt. Regular, light cleaning with the right tools keeps the need for deep, exhausting cleans at bay.
The Truth About Dusting in Bedrooms: What I’ve Learned
Bedrooms are dust factories, plain and simple. Fabric, skin cells, pet dander—it all accumulates, affecting air quality and allergy symptoms. Over the years, I’ve tried every dusting method under the sun. Some are better than others, but consistency and the right tools make all the difference. You can’t just swipe at surfaces; you need to truly remove the dust, not just relocate it.
Dusting Methods: A Quick Look
Many people use feather dusters, and while they seem effective, they often just stir dust into the air, only for it to settle elsewhere. Microfiber cloths are better, capturing dust particles with their electrostatic charge, but they require frequent washing and can miss some of the finer particles or those in tight spots. For electronics, or areas where wiping might be too abrasive, these methods fall short. This is where an air duster shines, offering a contact-free, powerful solution.
| Method | Pros | Cons | Best Use Case |
|---|---|---|---|
| Feather Duster | Quick for light surface dust; covers large areas fast. | Spreads dust into the air; doesn’t truly remove particles. | Very light, superficial dusting on non-critical surfaces. |
| Microfiber Cloth (Damp) | Captures dust effectively; streak-free finish; reusable. | Needs frequent rinsing/washing; can’t reach tight crevices. | Flat surfaces (dressers, nightstands), wiping down electronics. |
| Cordless Air Duster | Blasts dust from crevices; no contact needed; powerful, consistent airflow. | Can blow dust into air if not careful; requires charging. | Electronics, vents, intricate decor, hard-to-reach spots. |
| Vacuum with Brush Attachment | Removes dust entirely; good for upholstery and curtains. | Can be cumbersome; attachments might scratch delicate surfaces. | Curtains, blinds, under furniture, mattress edges. |
My preference is a combination: a damp microfiber for flat surfaces and my T800 Electric Air Duster for everything else. It means the dust is either captured or blasted away completely, rather than just moved around. For areas like lamp shades or delicate framed art, where a cloth might snag or smudge, the air duster is invaluable. It’s also fantastic for blowing dust out of window blind slats, pushing it towards an open window or into a waiting vacuum nozzle.
My Verdict on Budget-Friendly Cordless Air Dusters
You don’t need to break the bank to get a decent electric air duster, but sometimes spending a little more pays off. I’ve used cheaper models, like the T150 Elektrischer Luftbläser, which costs about $41.08 and has a solid 4.6/5 rating from 284 reviews. It’s a perfectly capable device for basic dusting, with 110,000 RPM and three speeds. However, if you’re serious about long-term use and maximum power for heavy-duty tasks, I recommend saving up a bit more for something like the T800 Electric Air Duster. The T800 offers superior sustained pressure and a more robust build that stands up to frequent, demanding use, making it the clear winner for me in terms of overall performance and durability.
Flooring Care Beyond the Mop: Hidden Dust Traps
Most people think of flooring care as sweeping, vacuuming, and mopping. And those are crucial, absolutely. But what about the spots your mop can’t reach, or the dust your vacuum misses? There are specific areas that collect an astonishing amount of debris, and ignoring them means your “clean” floors aren’t truly clean. These hidden traps impact air quality and can even degrade your flooring over time.
What I Look For in Floor Cleaning Attachments
When it comes to my vacuum, I scrutinize the attachments. A flat, narrow crevice tool is non-negotiable for getting between appliances, along baseboards, and into the tight gaps where wall meets floor. A soft dusting brush is also essential for delicate hardwood or engineered wood, preventing scratches while lifting surface dust. For carpets, a motorized brush head is a must to agitate and lift embedded dirt. I also love a good extension wand to reach under heavy furniture without having to move it. My preference leans towards vacuums with strong suction and a good filtration system, like a HEPA filter, to ensure that the dust I pick up stays in the vacuum and isn’t exhausted back into the air.
- Underneath furniture: Beds, sofas, entertainment units. These are massive dust bunnies magnets. Use a slim vacuum attachment or a flat mop with an electrostatic cloth.
- Baseboards and trim: Dust settles here constantly. A quick swipe with a damp microfiber cloth or a burst from an air duster is incredibly effective.
- Behind doors: The area where a door swings open and hits the wall often accumulates dust and hair that gets pushed there.
- Grout lines (tile floors): These recessed lines trap dirt and can darken over time. Regular scrubbing with a dedicated grout brush and a mild cleaner is important. My go-to is often a paste of baking soda and hydrogen peroxide.
- Carpet edges and corners: Even with a powerful vacuum, the very edges where carpet meets baseboard can be stubborn. A crevice tool is vital here.
- Radiator fins or heating vents: If your floors have built-in heating vents, they’re prime spots for dust to accumulate and recirculate when the heat comes on. A powerful air duster can clear these out in seconds.
Addressing these hidden areas regularly not only makes your floors look cleaner but also significantly improves the air quality in your home. It’s about being thorough, not just visible.
Keeping Electronics Dust-Free: A Q&A
Dust is the enemy of electronics. It acts as an insulator, causing components to overheat, shortening their lifespan, and potentially leading to performance issues. I’ve seen countless devices fail prematurely because of simple dust neglect. Here are some common questions I get about keeping electronics clean.
How often should I dust my PC and keyboard?
For a desktop PC, I recommend a thorough internal dusting every three to six months, depending on your environment. If you have pets, carpet, or live in a dusty area, aim for quarterly. Your keyboard, on the other hand, should be dusted more frequently. I give mine a quick blast with my T800 Electric Air Duster every two weeks, sometimes more if I’ve been eating snacks at my desk. Crumbs and dust build up quickly and can make keys sticky or unresponsive.
Is it safe to use an air duster on sensitive electronics?
Absolutely, but with a few caveats. Always ensure the device is powered off and unplugged. When using a powerful duster like the T800, keep a reasonable distance (6-8 inches) to avoid over-pressurizing components. The key is to use short, controlled bursts, not a continuous stream, especially on delicate circuit boards. For very sensitive areas, you can even dial down the power if your duster has adjustable settings, as the T800 does. The T150 Elektrischer Luftbläser, with its three speed settings, also offers good control for lighter tasks.
What about my gaming console’s vents?
Gaming consoles generate a lot of heat, and their cooling systems are vital. Dust accumulation in the vents is a common issue that leads to overheating and loud fan noise. I regularly use my air duster on my console’s intake and exhaust vents. Point the duster at an angle to dislodge dust from inside, rather than just pushing it further in. Again, make sure the console is off and unplugged. This simple routine can significantly extend the life of your console and keep it running quietly.
Investing in Longevity: Tools That Pay for Themselves
It’s easy to view cleaning supplies as a recurring expense, but the right tools are an investment. They save you time, reduce the need for professional cleaning services, and extend the life of your furniture, appliances, and home surfaces. I’ve found that focusing on versatile, durable equipment is far more economical in the long run than constantly replacing cheap alternatives.
The Value of Versatile Cleaning Gadgets
Take an electric air duster, for example. It cleans my PC, bathroom vents, intricate bedroom decor, and even outdoor equipment. That’s multiple tasks handled by one reliable device. The initial outlay for a quality product like the T800 Electric Air Duster might seem higher than a pack of canned air, but it eliminates constant repurchases, reduces waste, and performs better. The same principle applies to good quality microfiber cloths, ergonomic brushes, and a powerful vacuum cleaner with useful attachments. These items aren’t just for cleaning; they’re for preserving the value and comfort of your home. They transform a tedious chore into an efficient process, leaving you with more time and a genuinely cleaner living space.