
Outdoor Deck Flooring: 6 Materials Ranked by Durability and Cost
Outdoor Deck Flooring: 6 Materials Ranked by Durability and Cost
The biggest myth in deck planning is that composite decking is maintenance-free. It isn’t. Composite still grows mold and mildew, still stains from grease and tree tannins, and still needs annual washing. What manufacturers actually mean is that composite requires less maintenance than wood — which is accurate, but a different promise entirely. Go in expecting zero upkeep and you’ll be scrubbing a neglected deck by year two.
What follows is a breakdown of the six outdoor deck flooring materials worth considering, what each genuinely costs installed, where each earns its price — and what most renovation guides skip before the first board ever goes down.
How 6 Outdoor Deck Materials Actually Stack Up
Material price is the smallest part of your total spend. Labor, framing, fasteners, and long-term maintenance often double or triple the sticker. Here’s the full picture in one place.
Side-by-Side Comparison: Cost, Lifespan, and Maintenance
| Material | Material Cost ($/sq ft) | Installed Cost ($/sq ft) | Lifespan | Annual Maintenance |
|---|---|---|---|---|
| Pressure-Treated Pine | $1.50–$3 | $8–$12 | 15–25 years | Sand and seal every spring |
| Cedar | $3–$6 | $10–$15 | 20–30 years | Seal every 2–3 years |
| Ipe Hardwood | $8–$14 | $20–$35 | 40–75 years | Oil once per year |
| Composite (mid-range) | $4–$10 | $14–$22 | 25–30 years | Annual washing |
| PVC Decking | $7–$15 | $18–$30 | 30–50 years | Soap and water only |
| Porcelain Pavers | $4–$12 | $15–$28 | 50+ years | Low-pressure wash |
The Best Pick for Most Homeowners
For a suburban home in a non-coastal climate, Trex Transcend ($8–$11/sq ft material) or Fiberon Horizon ($6–$9/sq ft) hits the practical sweet spot. Both use a capped surface layer with 25-year fade and stain warranties. Fiberon saves you $2–$3 per square foot and performs almost identically to Trex in moderate climates.
If you’re in a coastal or high-humidity climate — Florida, the Gulf Coast, the Pacific Northwest — go straight to TimberTech AZEK ($10–$15/sq ft). It’s full PVC, not wood-composite, so salt air and prolonged moisture won’t degrade the boards the way they do standard composite over a 15-year window.
When Natural Wood Still Makes Sense
Two real scenarios where wood beats composite: tight budgets and longevity outliers. Pressure-treated pine at $8–$12 installed is a legitimate 20-year deck if you commit to sealing it every spring — no excuses. And ipe hardwood (Brazilian walnut) at $20–$35 installed remains one of the only deck materials that genuinely outlasts everything else. A properly maintained ipe deck can last 75 years.
Western Red Cedar splits the difference — natural rot resistance, beautiful grain, takes paint and stain well, and costs roughly half what ipe does. For covered porches in damp climates, it’s a sensible pick that holds up better than most composite options at the same price point.
Clearing Your Property Before the Build
Most deck guides jump straight to material selection. They skip the step that actually determines whether your project goes smoothly: preparing the site before the first footing gets poured.
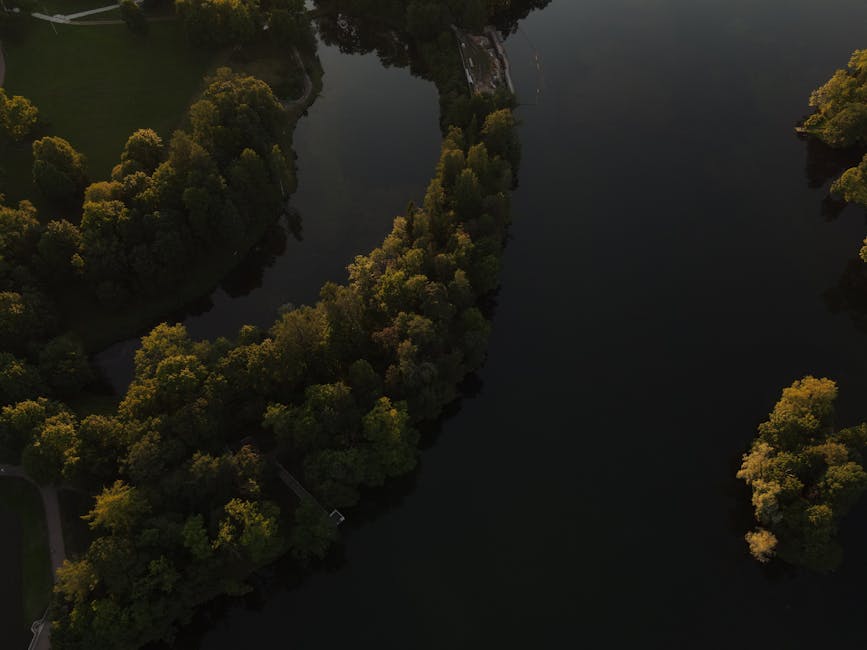
This means cutting back vegetation, grading for drainage, removing debris, and working in areas of your yard that may not have been touched in years. That’s physical ground-level work — often in overgrown corners, near tree lines, or alongside water features.
Drainage and Ground Clearance Requirements
Every deck needs a minimum 6-inch air gap between the ground and the bottom of the floor joists. This isn’t optional — it’s what prevents rot and mold from destroying the framing within five to seven years. The ground underneath also needs to slope away from your foundation at roughly 6 inches of drop per 10 horizontal feet.
Getting that clearance and slope right means excavating low spots, regrading high ones, and installing weed barrier fabric with a 3–4 inch compacted gravel drainage bed. In most neglected backyards, that work means cutting through 2–4 feet of overgrown vegetation, pulling roots, and moving material that has accumulated over seasons. You’re often on your hands and knees in areas that back up to wooded lots or unmaintained property lines.
Protecting Yourself During Brush Clearing
Snakes are a genuine hazard during ground-level clearing work. About 8,000 venomous snake bites happen in the US each year, and most hit the lower leg and ankle — exactly the exposure zone when you’re kneeling in brush or moving through tall grass. This applies across most of the southeastern US, the Midwest, California, and the Southwest.
Wearing adjustable waterproof snake gaiters over your work pants and boots is the straightforward fix. The Snake Gaiters and Chaps for Men and Women ($33.99) cover from the ankle to just below the knee — the primary bite zone — and strap securely over most boot styles without restricting movement. They’re waterproof, which matters when you’re clearing damp areas, and at roughly 1.5 lbs per pair they’re light enough to wear through a full afternoon of clearing without fatigue. At 4.3 out of 5 stars across 65 verified reviews, users consistently highlight that the adjustable straps fit reliably over different boot widths and that the camouflage finish holds up well through rough terrain. The sizing works for both men’s and women’s builds.
Beyond snake protection: wear thick leather work gloves during clearing. Broken glass, rusted metal staples, and thorny vines hide in overgrown areas. Work in the morning when snakes are least active. And call 811 before any digging — utility line strikes cause more injuries on home improvement projects than most homeowners realize.
Site Prep Checklist Before the First Footing
- Call 811 and mark all underground utility lines before digging
- Clear vegetation across the full deck footprint plus 12 inches on each side
- Confirm and correct slope (minimum 2% grade away from foundation)
- Remove debris and level major high and low spots
- Install weed barrier fabric and 3–4 inches of compacted gravel beneath the deck area
- Pull permits before footings go in — unpermitted structures create serious title and resale problems
Composite vs. PVC: The Short Answer
PVC wins on performance. Composite wins on price. If you’re within a mile of saltwater or in a zone with heavy sustained rainfall, pay the extra $3–$5 per square foot for TimberTech AZEK or Deckorators Vault and stop deliberating. For everyone else inland, Trex Transcend gives you 90% of PVC’s durability at a meaningfully lower installed cost — and both materials still get brutally hot on a 90°F afternoon, regardless of what any salesperson tells you.
Porcelain Pavers Are Underrated for Outdoor Flooring
If you’re building a ground-level patio rather than an elevated deck, porcelain pavers should be the first option you price out — not an afterthought. Most homeowners skip them because they associate porcelain with interior bathrooms. That mental model is wrong for outdoor applications.
Outdoor rectified porcelain pavers from Florim USA and PORCELANOSA are engineered for exterior use: fired at higher temperatures, rated for freeze-thaw cycling, and finished with slip-resistant textures. A 20×20-inch Florim USA paver runs $5–$10 per square foot for the tile — directly competitive with mid-range composite on material cost. The installed cost ($15–$28/sq ft) is comparable to composite when you factor in that porcelain needs no ongoing treatment.
The Real Advantages of Porcelain Outdoors
Three things porcelain does better than any wood-based decking: heat resistance, lifespan, and water performance. A light-colored porcelain surface stays 30–40°F cooler than dark composite boards on a hot summer day. The material doesn’t absorb water, doesn’t rot, and needs no annual sealing or staining. At 50+ years of expected lifespan, the long-term cost-per-year math often beats composite by a wide margin.
The limitation is installation. Porcelain pavers need a stable, properly prepared base — a concrete slab, a sand-set compacted gravel system, or a pedestal system for elevated applications. Uneven settling causes cracked tiles and tripping hazards that are expensive to fix. This is one of the few outdoor flooring projects where professional installation pays for itself if you don’t have base prep experience.
When Porcelain Doesn’t Make Sense
Elevated second-story decks. Porcelain is heavy and requires either a structural concrete surface or a costly pedestal system — neither of which is practical for most elevated deck builds. Composite or PVC remains the right call for raised structures.
For DIYers who want a patio-feel product that’s more forgiving of base imperfections, Belgard Pavers makes a concrete paver option at $3–$6 per square foot. It won’t match porcelain’s appearance or longevity, but it tolerates minor base irregularities much better and works well for entry-level patio projects on a moderate budget.
What a 400 sq ft Deck Costs in 2026
Most online calculators show material costs only. Here’s the complete picture for a 400 sq ft ground-level composite deck, rectangular layout, no built-in stairs or benches.
Full Cost Breakdown: DIY vs. Contractor
| Cost Category | DIY Cost | Contractor Cost | Notes |
|---|---|---|---|
| Composite decking (Trex Transcend) | $3,600–$4,400 | $3,600–$4,400 | ~$9–$11/sq ft material |
| Pressure-treated framing lumber | $800–$1,200 | $800–$1,200 | Joists, beams, ledger board |
| Concrete footings (4–6 footings) | $200–$400 | $400–$700 | DIY tube forms save significantly here |
| Hidden fasteners and hardware | $300–$500 | $300–$500 | Frequently underestimated by 40–50% |
| Metal connectors and post hardware | $200–$350 | $200–$350 | Joist hangers, post bases, angle brackets |
| Contractor labor | $0 | $3,000–$6,000 | $15–$25/sq ft labor only |
| Permits | $100–$400 | $100–$400 | Required in most municipalities |
| Total Estimate | $5,200–$7,250 | $8,400–$13,550 |
Three Ways to Cut Costs Without Cutting Corners
- Buy decking in late fall or winter. Composite manufacturers discount prior-year color runs, and lumber yards reduce slow-moving stock. Realistic savings of 15–25% on materials with no quality trade-off.
- Use pressure-treated pine for all framing regardless of your surface material. There’s no structural or visual reason to use composite lumber for joists and beams nobody sees. This one decision saves $800–$1,500 on a 400 sq ft project.
- Get a minimum of three contractor quotes. Labor costs for identical scope in the same zip code regularly vary by $3,000–$5,000. The spread is wider than most homeowners expect the first time they shop.
The Budget Line That Always Gets Missed
Metal connectors are the consistent blind spot. Joist hangers, post base plates, angle brackets, and beam caps for a standard 400 sq ft deck add $200–$350 to the project. Most online calculators omit this entirely. Budget for it upfront — you’ll need it anyway, and finding out at the hardware store mid-build is annoying.
Making the Most of Your Outdoor Space After Installation

New decking sets the stage. What you add determines whether the space gets used three months per year or twelve.
Shade Solutions That Actually Extend Usable Hours
A south-facing deck without shade cover is realistically usable about three hours a day in summer. A pergola changes that math. YARDISTRY and Sunjoy both make modular pergola kits in the $800–$2,500 range that most handy homeowners can assemble in a weekend. Add a 10×12-foot shade sail ($60–$120) for direct overhead coverage and you extend usable deck hours dramatically — often doubling them for afternoon use.
String lights are the highest return-on-investment deck accessory most people overlook. The Brightech Ambience Pro 48-foot weatherproof strand ($45–$80) transforms a deck into an evening space. It takes under two hours to install and runs off a standard outdoor outlet.
Keeping Food and Drinks Cold Without a Built-In Bar
Not every deck needs a permanent outdoor kitchen or a plumbed-in bar fridge. For casual hosting — cookouts, neighborhood gatherings, weekend afternoons — a quality insulated cooler bag does the job at a fraction of the cost and uses zero permanent storage space.
The Soft Cooler Bag 40-Can 36L in Blue Floral ($31.99) covers most real-world outdoor entertaining scenarios. It holds up to 40 cans, the leakproof lining means ice melt won’t pool on your composite deck surface, and it collapses flat when not in use — a genuine advantage when you don’t have dedicated outdoor storage. Rated 4.3 out of 5 stars across 15 reviews, it delivers on the basics at a sub-$35 price point. For larger events, pair it with an Igloo 70-qt wheeled cooler ($85–$110) positioned near the back door for overflow — two coolers covering different zones works better than one massive cooler nobody wants to reach across.
Protecting the Decking Surface From Day One
Composite and PVC boards scratch more easily than wood when furniture legs drag across them. Put rubber or felt pads on every chair and table leg before the first outdoor dinner. Trex sells dedicated deck protector feet ($8–$15 per set) sized for common furniture legs. IKEA FIXA rubber-backed furniture pads ($3–$5) work well on lighter chairs. Skip this step and you’ll have permanent surface scratches on a $4,000+ decking install within one season of regular use.
Common Deck Flooring Questions, Answered Directly
Can composite decking be installed directly on concrete?
Yes, with composite sleepers or pressure-treated furring strips to create an air gap. Boards laid directly on concrete trap moisture underneath, which causes mold and almost universally voids manufacturer warranties. Use 1.5-inch sleepers to raise the deck surface and allow drainage. Trex, Fiberon, and TimberTech all publish specific on-grade concrete installation instructions with their warranted methods.
What is the correct spacing between composite deck boards?
At installation: 3/16 to 1/4 inch between board ends, 1/8 inch between board faces. Composite expands in heat — install boards too tight and they’ll buckle by August on a hot day. Most hidden fastener systems, including the Trex Hideaway ($0.70–$1.20 per fastener), set the face spacing automatically as you install, which removes the guesswork and speeds up the work.
Does composite decking need to be sealed or treated?
Standard (uncapped) composite: no sealant, but clean annually with a dedicated composite deck cleaner. Defy Composite Deck Cleaner ($20–$25 per gallon, covers 500 sq ft) removes mold, mildew, and tannin stains before they become permanent. Capped composite and full PVC: soap and water, or low-pressure washing. Never exceed 1,500 PSI on a pressure washer — higher pressure strips the protective cap layer and voids the warranty on most premium products.
How soon can you use a new deck after installation?
Composite and PVC: immediately. No cure time. Concrete-based patios: full cure strength at 28 days, though light foot traffic is usually fine after 7 days. Freshly sealed wood: 24–48 hours of drying time before foot traffic, 7 days before placing furniture on it.
The outdoor flooring category is improving faster than most homeowners track. Warranty lengths on composite and PVC products have grown significantly over the past decade, heat-management technology is a real focus for the next product generation from Trex and TimberTech, and rectified porcelain paver prices have dropped 20–30% from where they were five years ago. What’s considered premium outdoor flooring today — both in materials and warranty coverage — will very likely be the mid-range baseline within another five years.

")


